
How do I export a Floating Point Geotiff using QPS FMGT?
- Prepared with FMGT v7.10.1
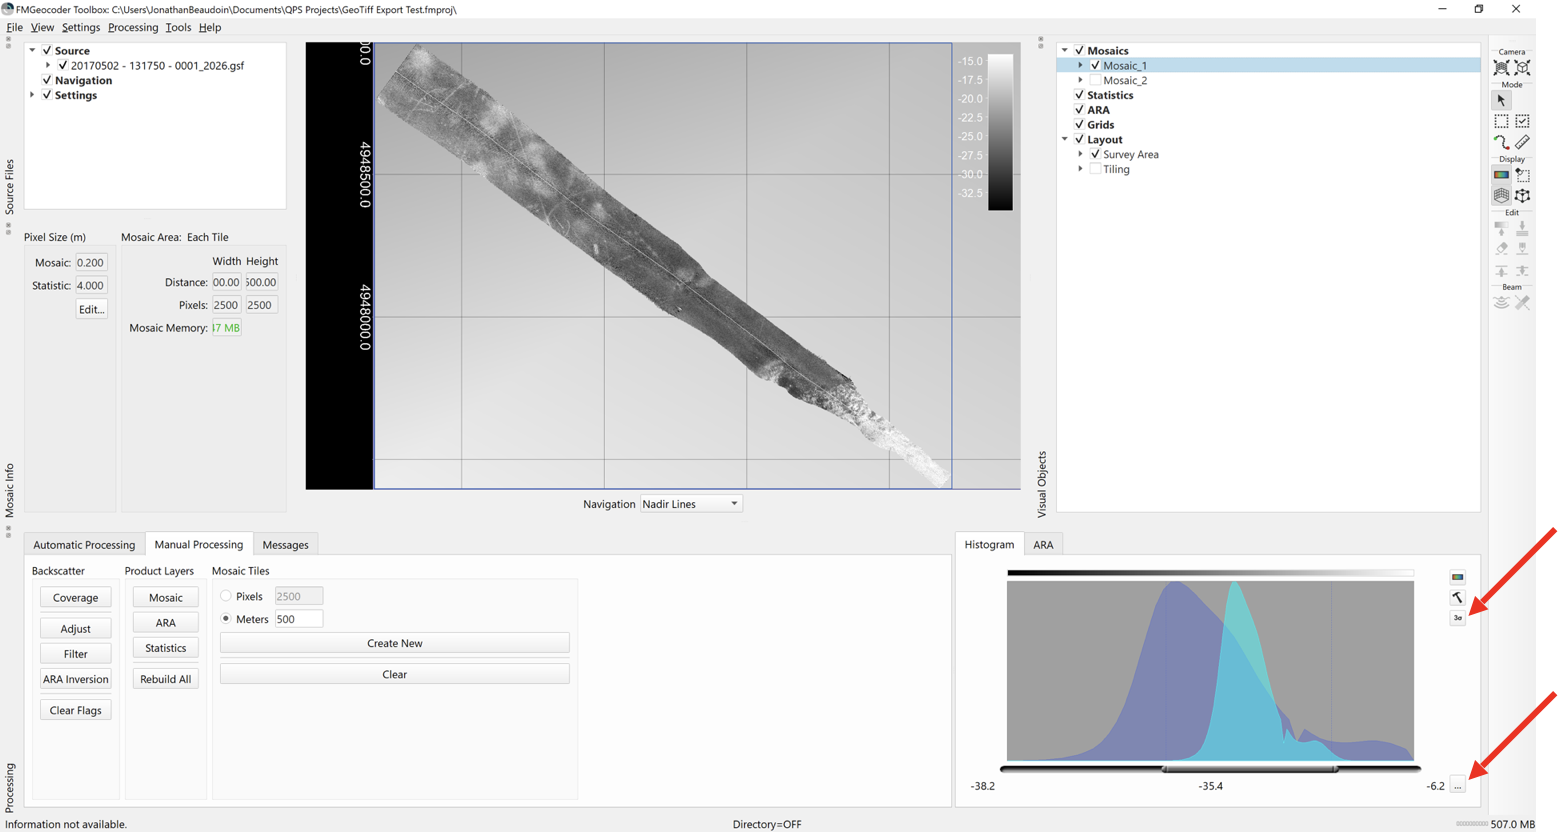
From the Histogram dock, adjust the left/right limits of the histogram to get the image contrast level that you need. You can click the “3σ” to automatically enhance the contrast to the 3-sigma range of the data. If you want consistent levels for different images, you may want to consider manually adjusting the limits with the “…” button on the bottom right. The contrast you set in the mosaic will be used in the GeoTiff export and will carry over to Absolute Ocean, so it’s important to get this first step correct.
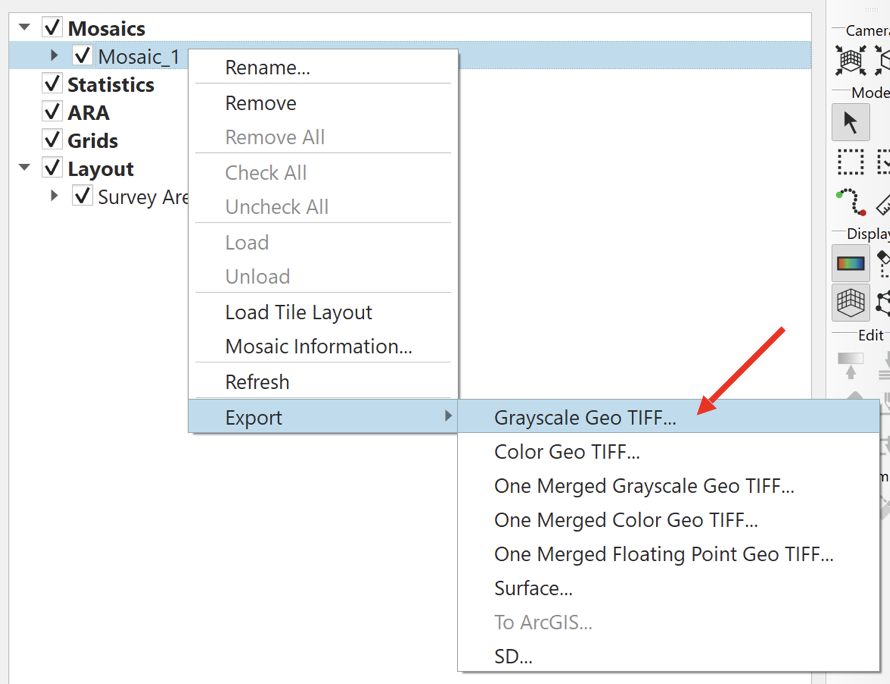
From the Visual Objects dock, select your backscatter mosaic and right-click. From the context menu, choose “Export” and then “Grayscale Geo TIFF…”. If you have a large survey area and you used Tiling, then choose the “One Merged Grayscale Geo TIFF…” option. You will be prompted to choose a file path and file name regardless of which option you choose.
Do NOT choose “One Merged Floating Point Geo TIFF…” since this will set the z-value in the exported product as a backscatter value, which Absolute Ocean would then want to treat as bathymetry. Backscatter data should be a grayscale Geo TIFF for use in Absolute Ocean.